Academics
Academics Style Guide
Centering a Chart/Table in the Question Stem
Creating Multiple-Choice Questions
Creating a New Product in ACE
GA Math - How to Find the new GA math standards
How to Create an Article in HelpDocs for Academics
Learnosity JSON Templates
Point Values and Scoring Logic for Item Types
Requirements for Activating Subjects
Uploading Videos to PL
Video Template Links
Account Executives
AE Opportunity Management
AE Quote Approval Process
Activating Prospect Trials - Account Executives
How Do I Clone a Quote?
How Do I Configure An Extra Free Months Promotion Quote?
How Do I Convert or Disqualify Leads?
How Do I Create Opportunity and Quote Records?
How Do I Create a District Quote?
How Do I Create a Lead Record?
How Do I Create a Multi-Year Proposal?
How Do I Edit an Existing Quote?
How Do I Prospect Using Quick Call? (Account Executives)
How Do I Work Inbound Leads?
How To Create Activity Records Associated With Opportunities
How to Schedule Demos and Events in Salesforce?
How to Work BDR Created Opportunities (Account Executives)
New Sales Quote Manager Approval Process
Pipeline Migration
Salesforce/Hubspot - AE Standard Operating Procedures
K-5 Demo Script
BDR- Business Development Representatives
How Do I Create an Opportunity Record? (BDRS)
How to Prospect Using Quick Call (BDRs)
Installation Steps to Complete for Mockingbird
Mockingbird App Training Video (Quick Call)
CRM
Customer Support
Chatbot Components
Horizon Education - Support Introduction
How Do I Classify Bug Support Cases in Salesforce?
How Do I Complete a Clever/Classlink integration?
How Do I Create a Case in Salesforce (phone call)?
How Do I Work Integration Cases in Salesforce?
How do I create a Customer Support Command Article?
Progress Learning Helpdocs Style Guide - Support
Horizon Education
IT Support & Systems
A.I. Artificial Intelligence
Calendly
Google Calendar
Google Workspace
Hardware
How to Add the Plano Office Printer to Your Progress Learning MacBook
Progress Learning Update Process (macOS)
IT Processes
Paycor
Getting Started With Objectives and Key Results (OKRs)
How Do I Complete Performance Reviews? (Employee)
How Do I Create Departmental/Individual Objectives in Paycor?
How Do I Submit Time Off?
How Do I Update My Photo in Paycor?
Paycor - 1:1s
Performance Insights - Objectives (DRAFT)
Performance Review (Managers)
Vonage
Zoom
How Do I Connect my Calendar with Zoom?
How Do I Reserve a Room at the Plano Office?
How Do I Share My Screen to the Mothership TV?
Zoom Best Practices
Zoom Cloud Recording Policy
Zoom Scheduling Privilege: How to Manage Meetings for Other Users
Booking Meeting & Phone Booth Space in Plano
DNS Adjustments (For Travel Use Only)
Everything You Need to Know about Slack
How Do I Submit Credit Card Expenses in Nexonia?
How Do I Submit a Salesforce IT Helpdesk Ticket?
How Do I Update My Photo in Google?
How do I use Bucketlist?
How to Create a New Article in Help Docs
How to Fix Wi-Fi Issues on Your MacBook While Traveling or Flying
Opensense Signatures for Progress Learning
Progress Learning Employee Group Management
Progress Learning Migration Steps
Setting up Salesforce Multi-Factor Authenticator
Using Ramp - Finance
Using Zywave
macOS Tahoe 26 Guide
Integration Processes
Enabling Notifications for Clever Status Updates
How to set up a Canvas Integration
How to set up a school with NWEA MAP
NWEA Mapping Page - Details & Troubleshooting Steps
Internal Training
AE Training Practice
BDR Training Practice - How to Create Opportunities
Contact Management
Onboarding Specialist Hands-on-Learning
Trial Procedures
Marketing
New Sales
Account Executive Quick Start Guide
How Do I Manage Contacts within Salesforce?
Request for Proposal (RFP)
Onboarding
How Do I Assign Onboarding Cases (Manager)?
How Do I Work Onboarding Cases?
How to Managing Event Settings in Google Calendar
Order Processing
Customer Invoice request (via Slack & Salesforce)
DPO- Delayed Payment Option Process
How Do I Take a Payment?
Order Processing Coordinator - Queueing Opportunities
Processing Orders - Getting Started
Tax Exemption Cases
What if I Receive a Task from Processing Regarding an Error?
Platform Training
How Do I Create an Employee Login for Progress Learning?
How Do I Input Data into Demo Accounts Quickly?
How Do I Use Our CRM?
Platform Training and Knowledge Check
Progress Learning - Platform Practice
Progress Learning Webinars
Student Experience Training - Internal
Product
Jira Bug Ticket Creation
Product Feedback
Product Roadmap
Progress Learning Updates
Release Highlight Videos
Renewals
CPQ - Quoting
How Do I Create a New Opportunity and Link it to an Existing Contract in Salesforce?
How to Add Upsell Products to a Renewal Quote
How to Create a Basic Renewal Opportunity and Quote
CPQ Amendments
CPQ Amendments- Full Return
CPQ Amendments- Partial Return
CPQ Amendments- Product Swaps
CPQ Amendments- Upsell / Add On
Sales Engagement and Work Queue
Trials
How to add a new contact record in Salesforce and add a relationship
Sales Collateral
Sales Training
Salesforce
CPQ
Salesforce Basics
SF Accounts
About Progress Learning Account Health Scorecards in Salesforce
Account Page Layout Changes (March '24)
How Do I Create a New Account Record?
How Do I Merge Accounts in Salesforce?
Manual Syncing Account Information Updates
Trial Upgrades
Updating Parent Accounts / Districts in Progress Learning
Updating Subscriptions / Contracts
Where Do I Find Progress Learning Account IDs in Salesforce?
SF Contacts
Atlas Permissions
Create and Customize List Views in Salesforce
How Do I Log Activities in Salesforce?
How Do I Manage Bad Leads in Quick Call?
How to Log a Call in Salesforce
How to send a list email in Salesforce
Navigating the Home Screen in Salesforce
Opportunity Page Layout Changes (June '24)
Salesforce Glossary
Salesforce List Views Overview
Searching in Salesforce
Send a Text Shortcut(Snippet)
Sending a Template
Update Time Zone in Salesforce
What are Salesforce Objects and Records?
Salesforce Release Notes
Sales Ops Release Notes: April '24 (I20)
Sales Ops Release Notes: Feb '24 (Georgia)
Sales Ops Release Notes: Jan 1, 2024
Sales Ops Release Notes: Jan 30, 2024 - Five Points
Sales Ops Release Notes: Mar '24 (Howell Mill)
Sales Ops Salesforce Release Notes Index
Salesforce Sales Engagement
Add a Contact to a Cadence
Check Info on a Contact within Inbox
Complete a Phone Step
Complete an Email Step
Connect Salesforce to Gmail
Connect Zoom to Salesforce
How Do I Create and Work Tasks in Salesforce?
Inbox Setup
Remove a Contact from a Cadence
Send a Meeting Time
Conga Sign Process
Messaging Configuration
PL Messaging Testing
Salesforce to Progress Learning Sync FAQS
Using the New Field Glossary Tool in Salesforce
Success (CSM)
Training Team
2025 Training Products
Helpdocs Request Form
How to Efficiently Build Data in Progress Learning
Links to Recorded Trainings and Links to Register for Live Training Webinars
Live Training Calendar
Monthly Webinar Topics (Webinar Blurbs)
New Trainers: Platform Practice
Presenter Post-Training Feedback Form
Progress Learning Helpdocs Style Guide
Training Brochure: Updated Fall 2025
Training Request Form
Table of Contents
- All Categories
- Account Executives
- Salesforce/Hubspot - AE Standard Operating Procedures
Salesforce/Hubspot - AE Standard Operating Procedures
Updated
by Zoe McCullough
Step 1: Schedule the Demo
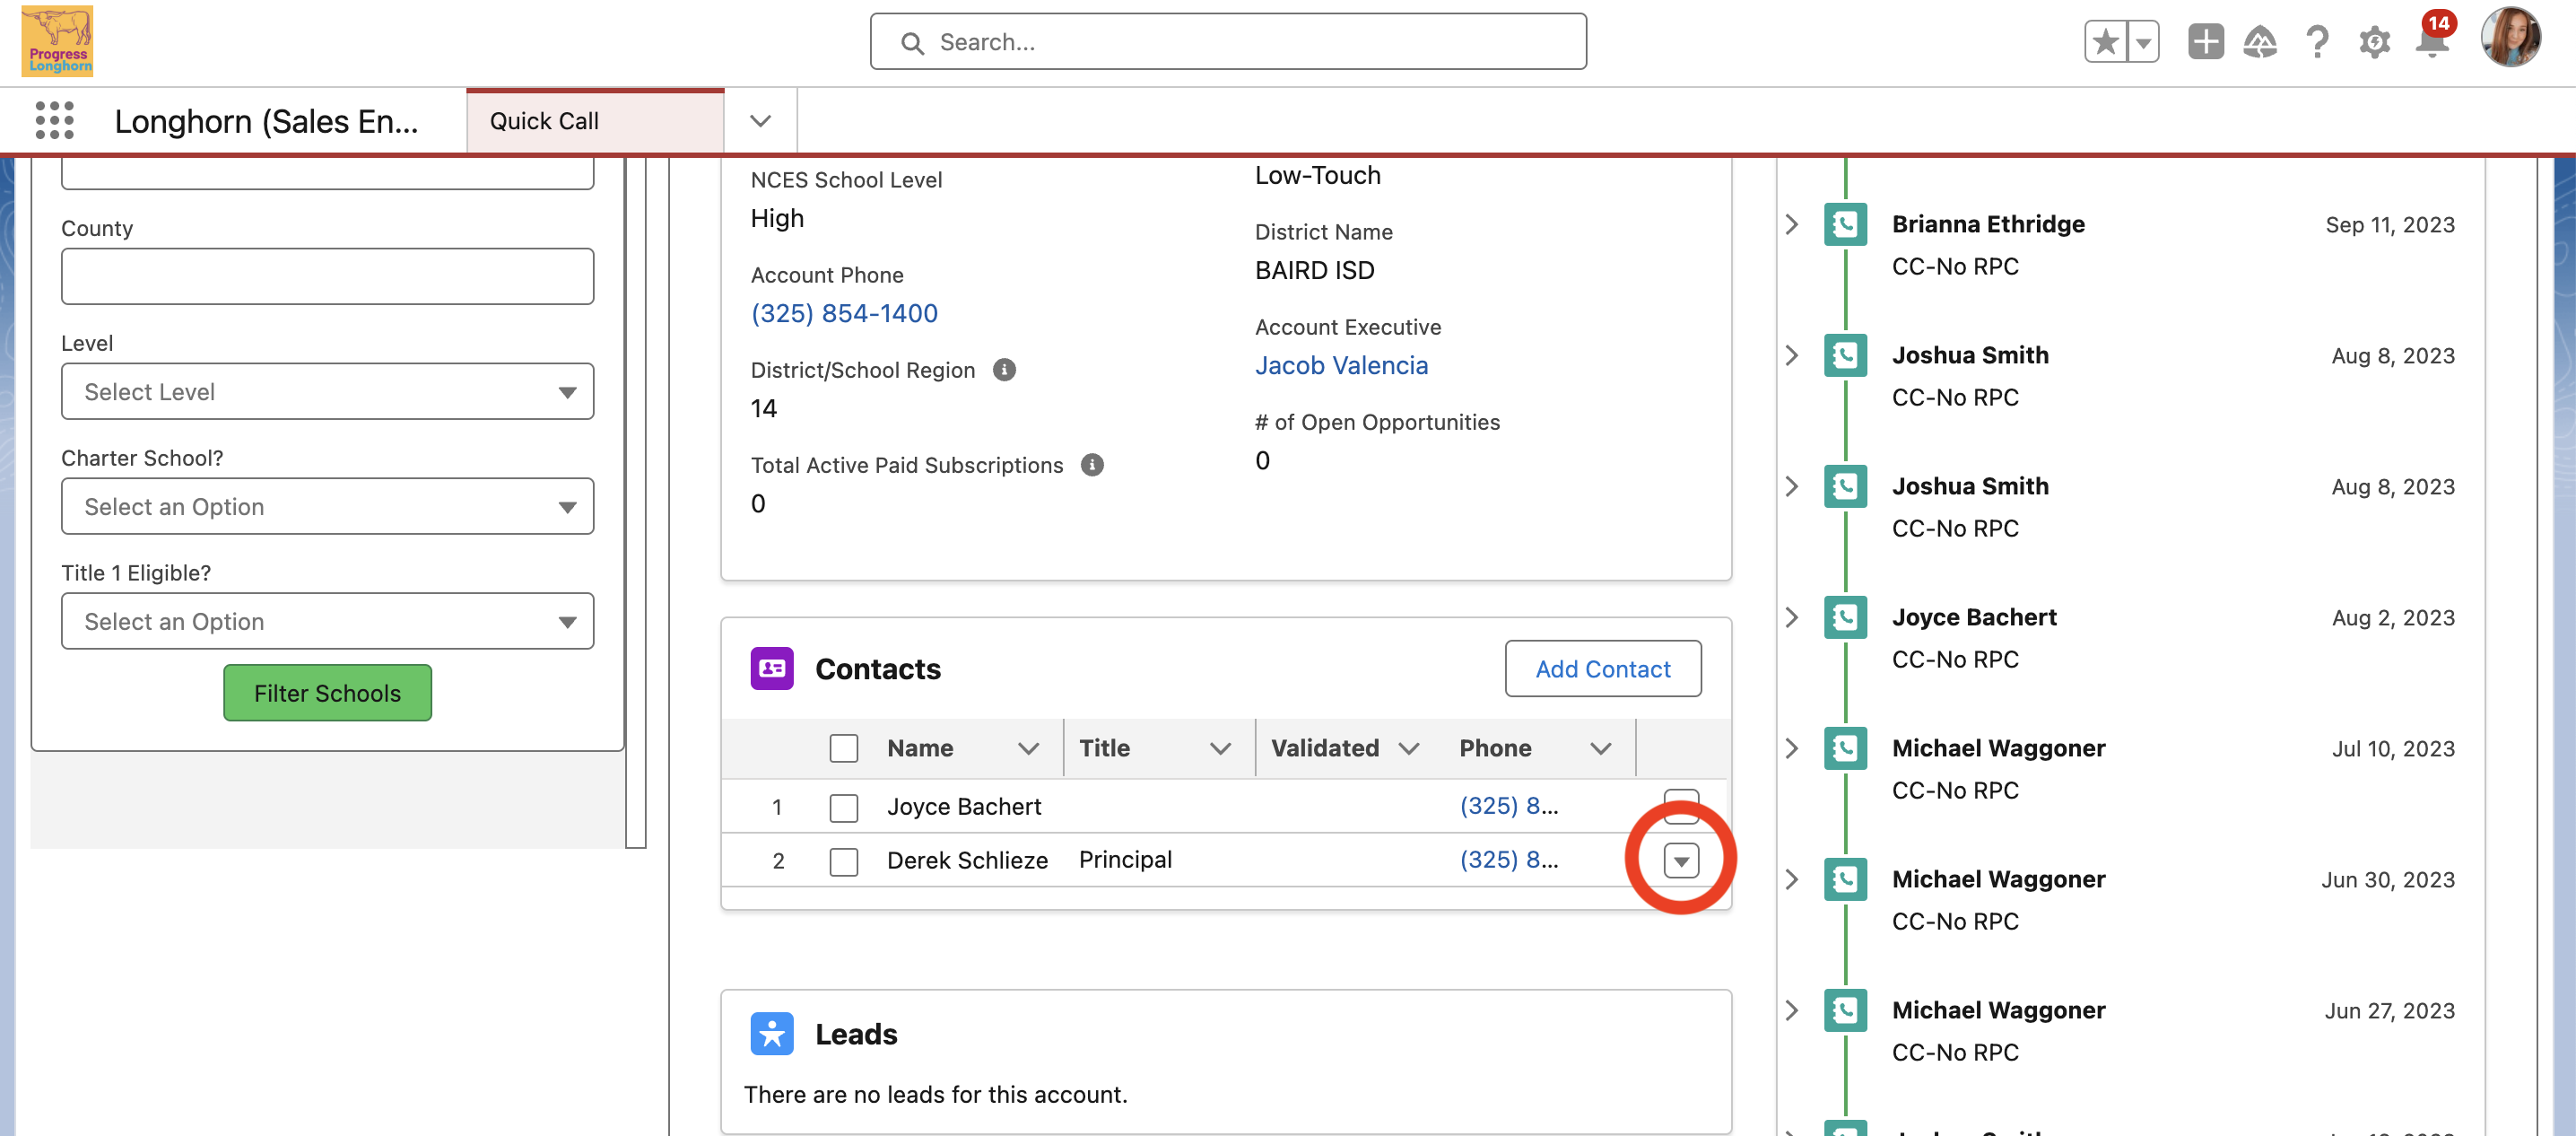
From Quick Call
- Click on the carrot next to the name of the person you spoke with and select "Schedule Meeting", then fill out the required information.
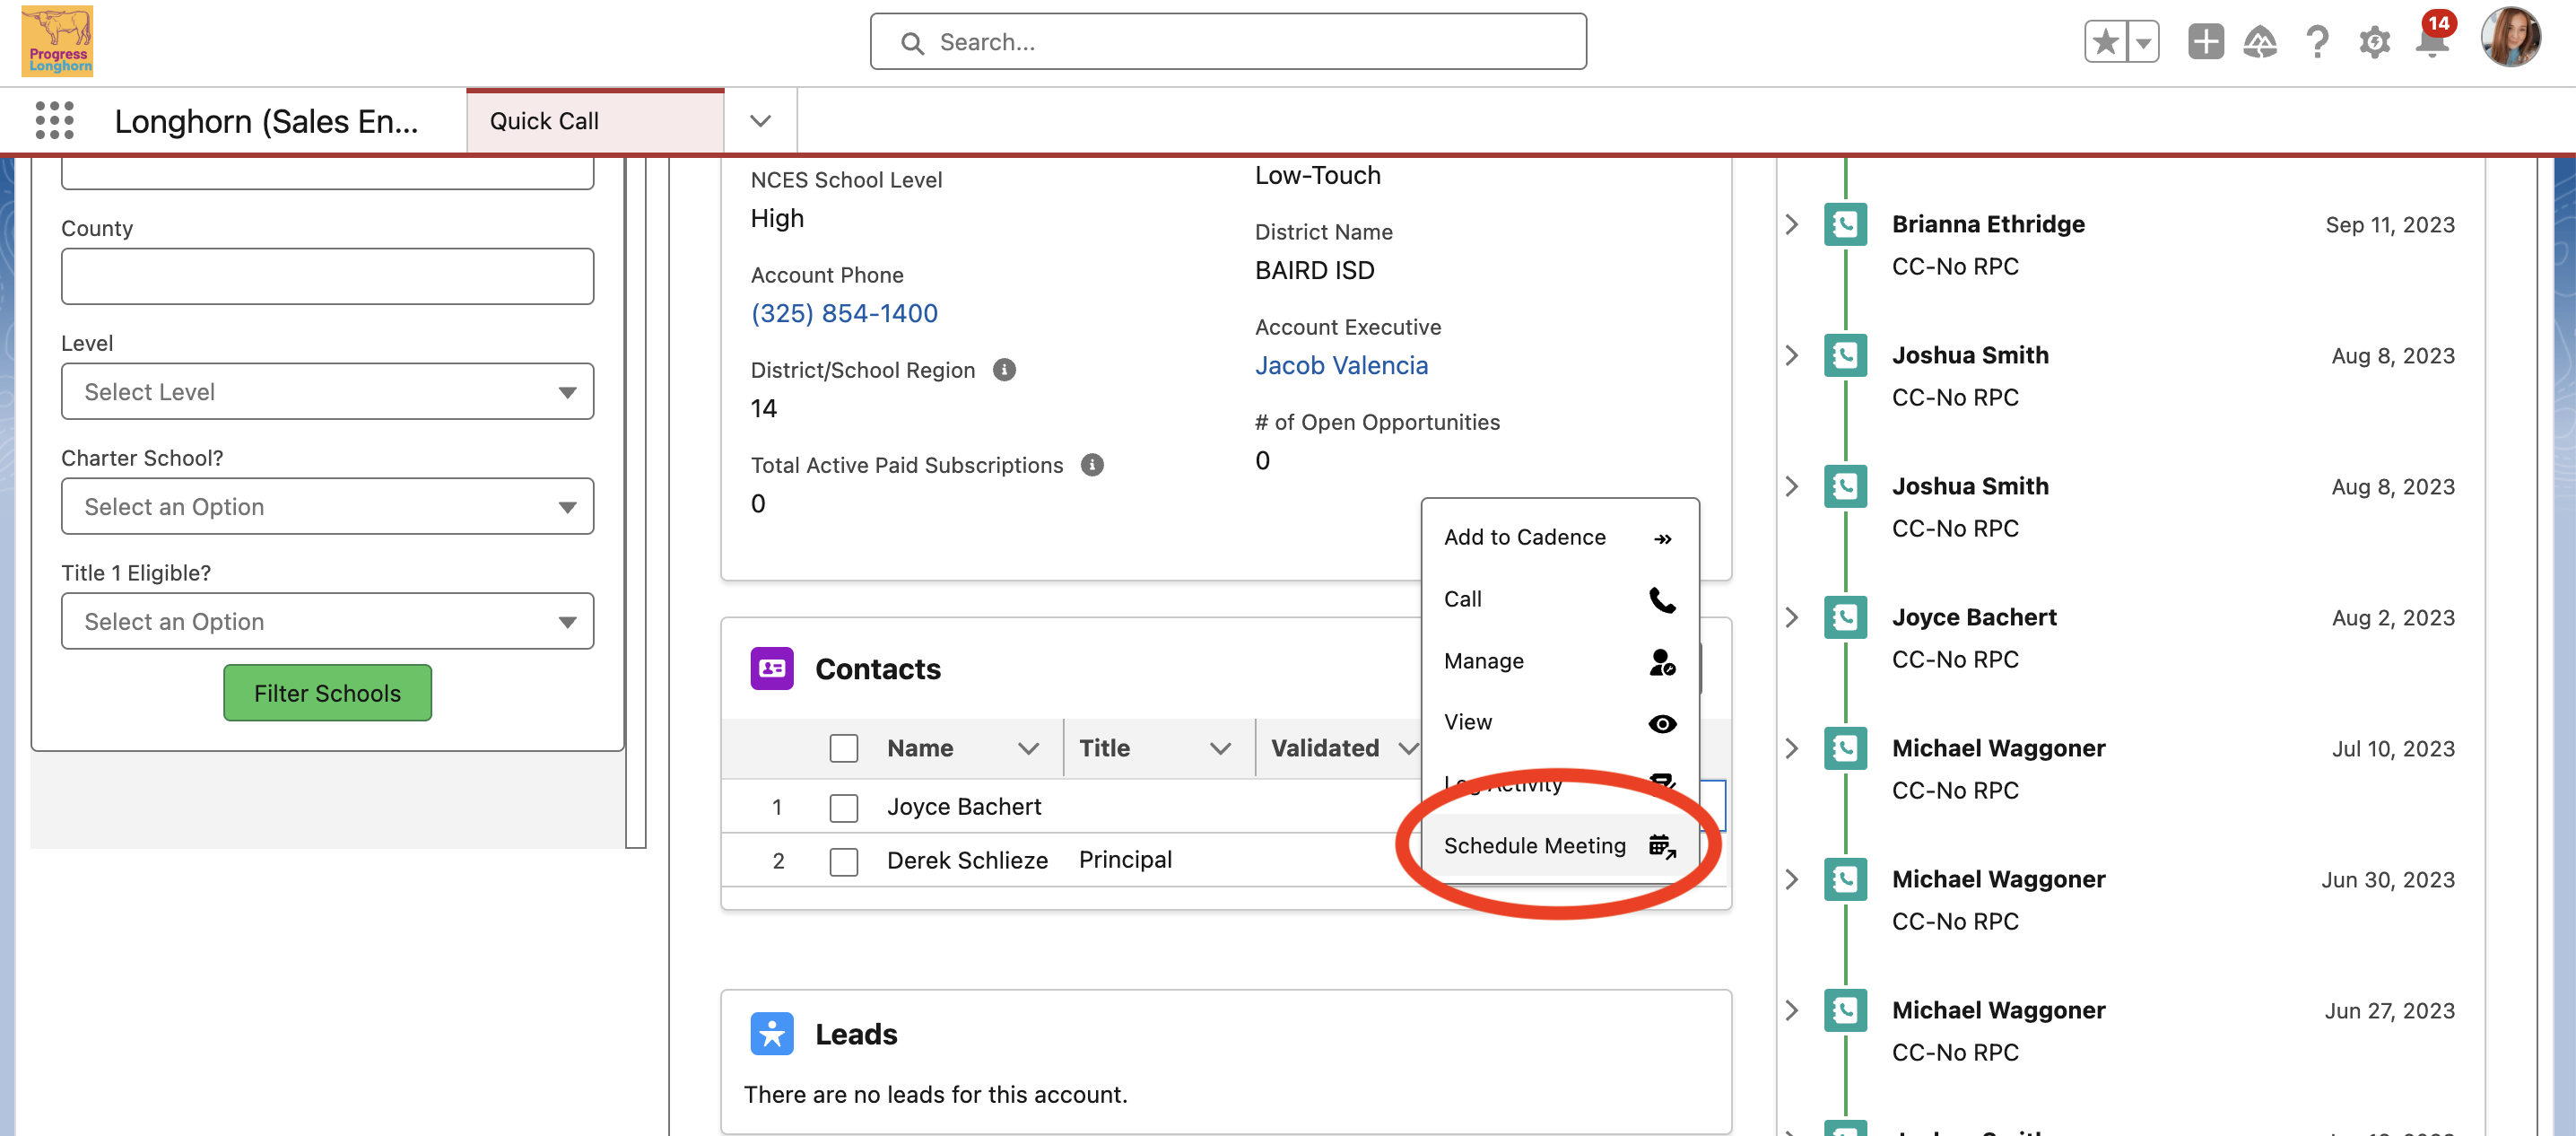
The Contact Record
- When you open up the contact record of the prospect you spoke with, click on the carrot drop-down and select "Schedule Meeting & Create Lead - AE".

Step 2: Create the Opportunity
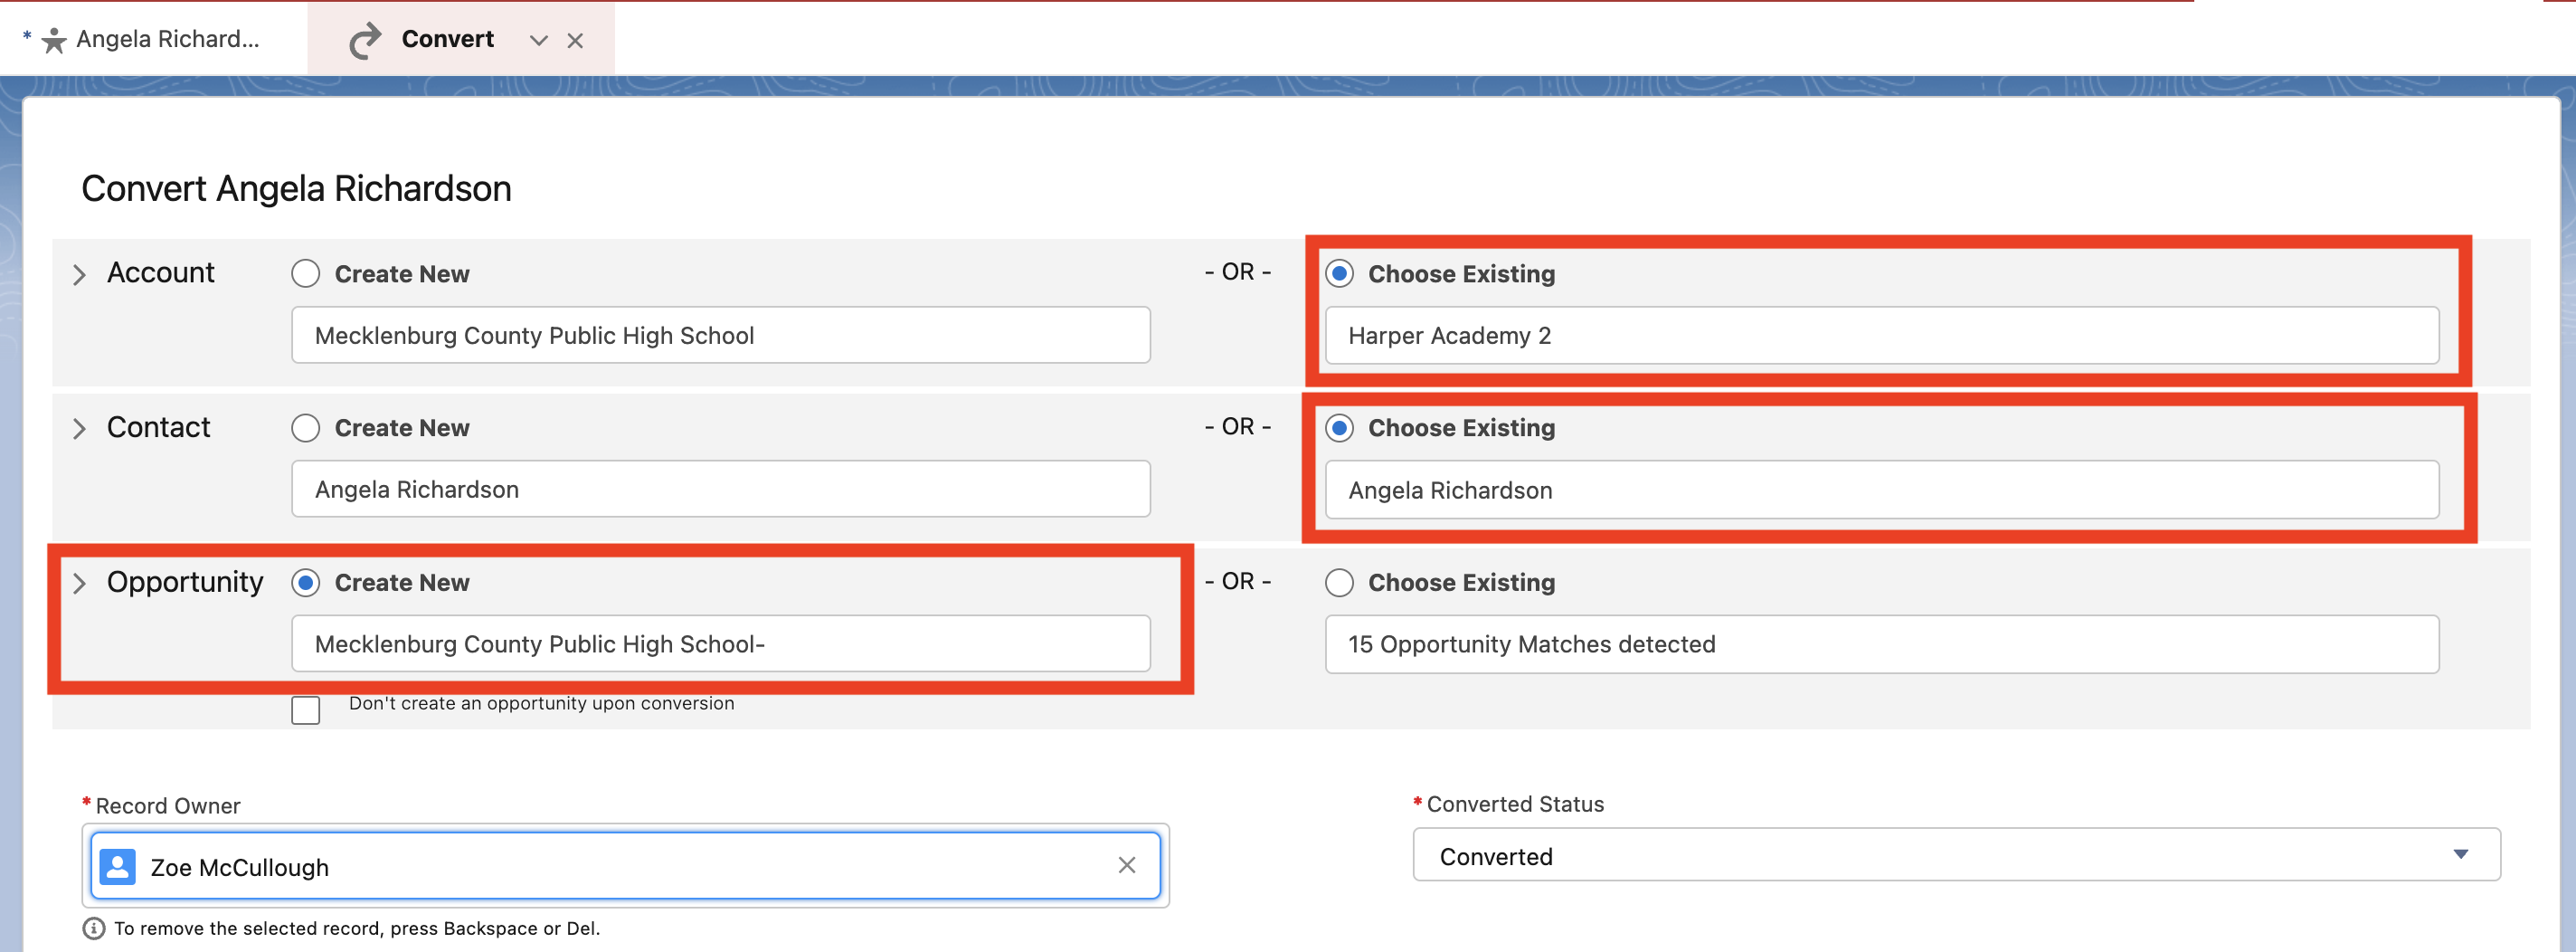
- Once the demo is booked from either quick call or the contact record, in Salesforce, search for the email address associated with the demo you booked, open the lead record, and fill in the "New Sales Lead Source" FIRST, then click "Converted".
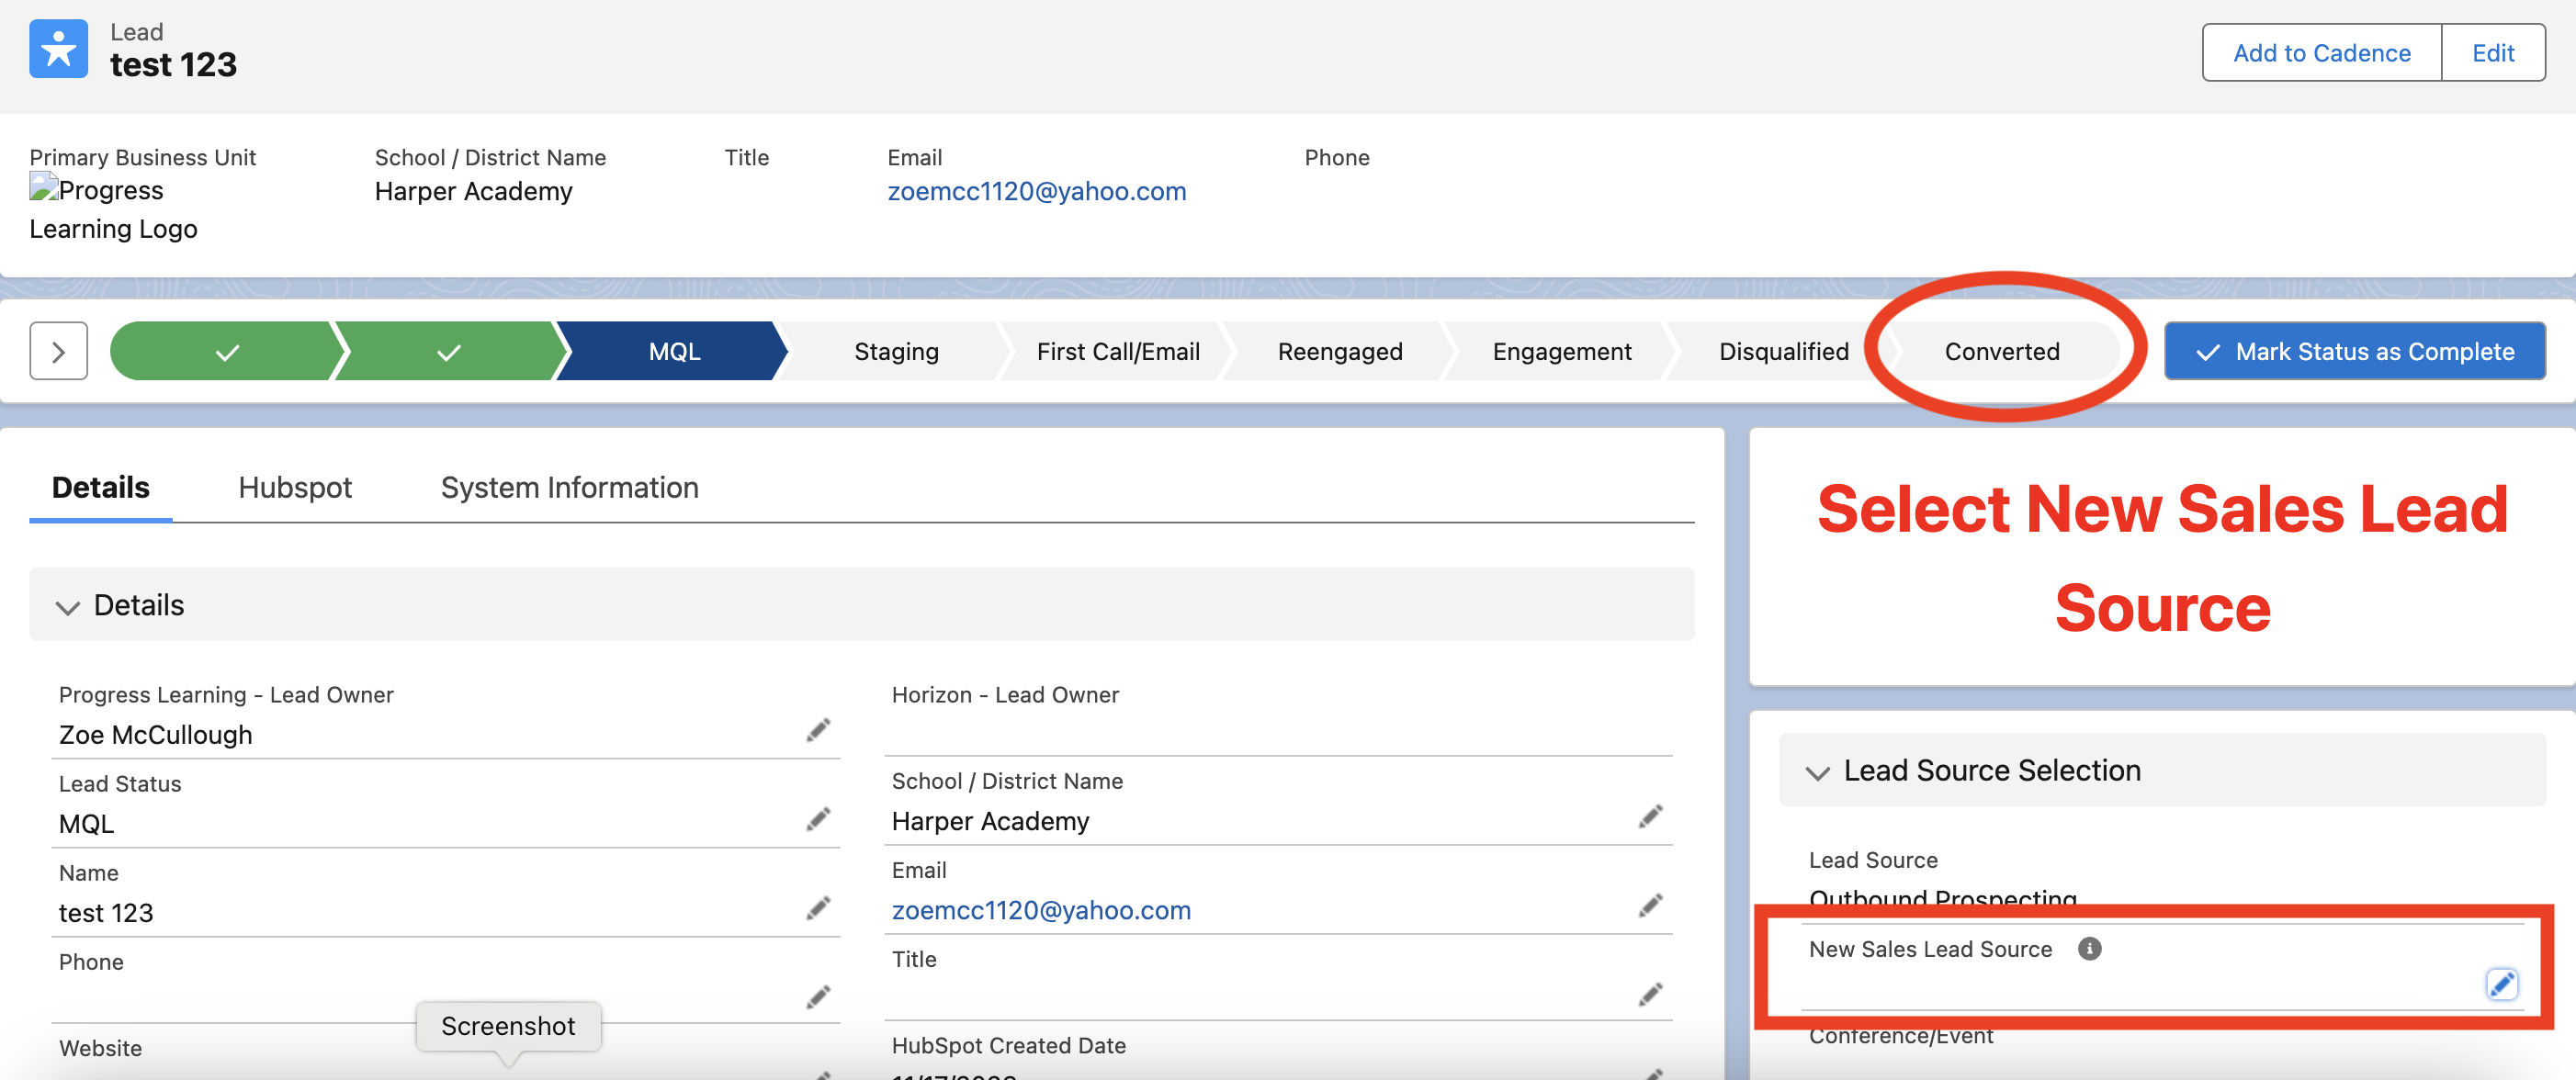
- This will bring you to a page that allows you to relate the lead. Select the options shown below:
Account - "Choose Existing"
Contact - "Choose Existing"
Opportunity - "Create New"
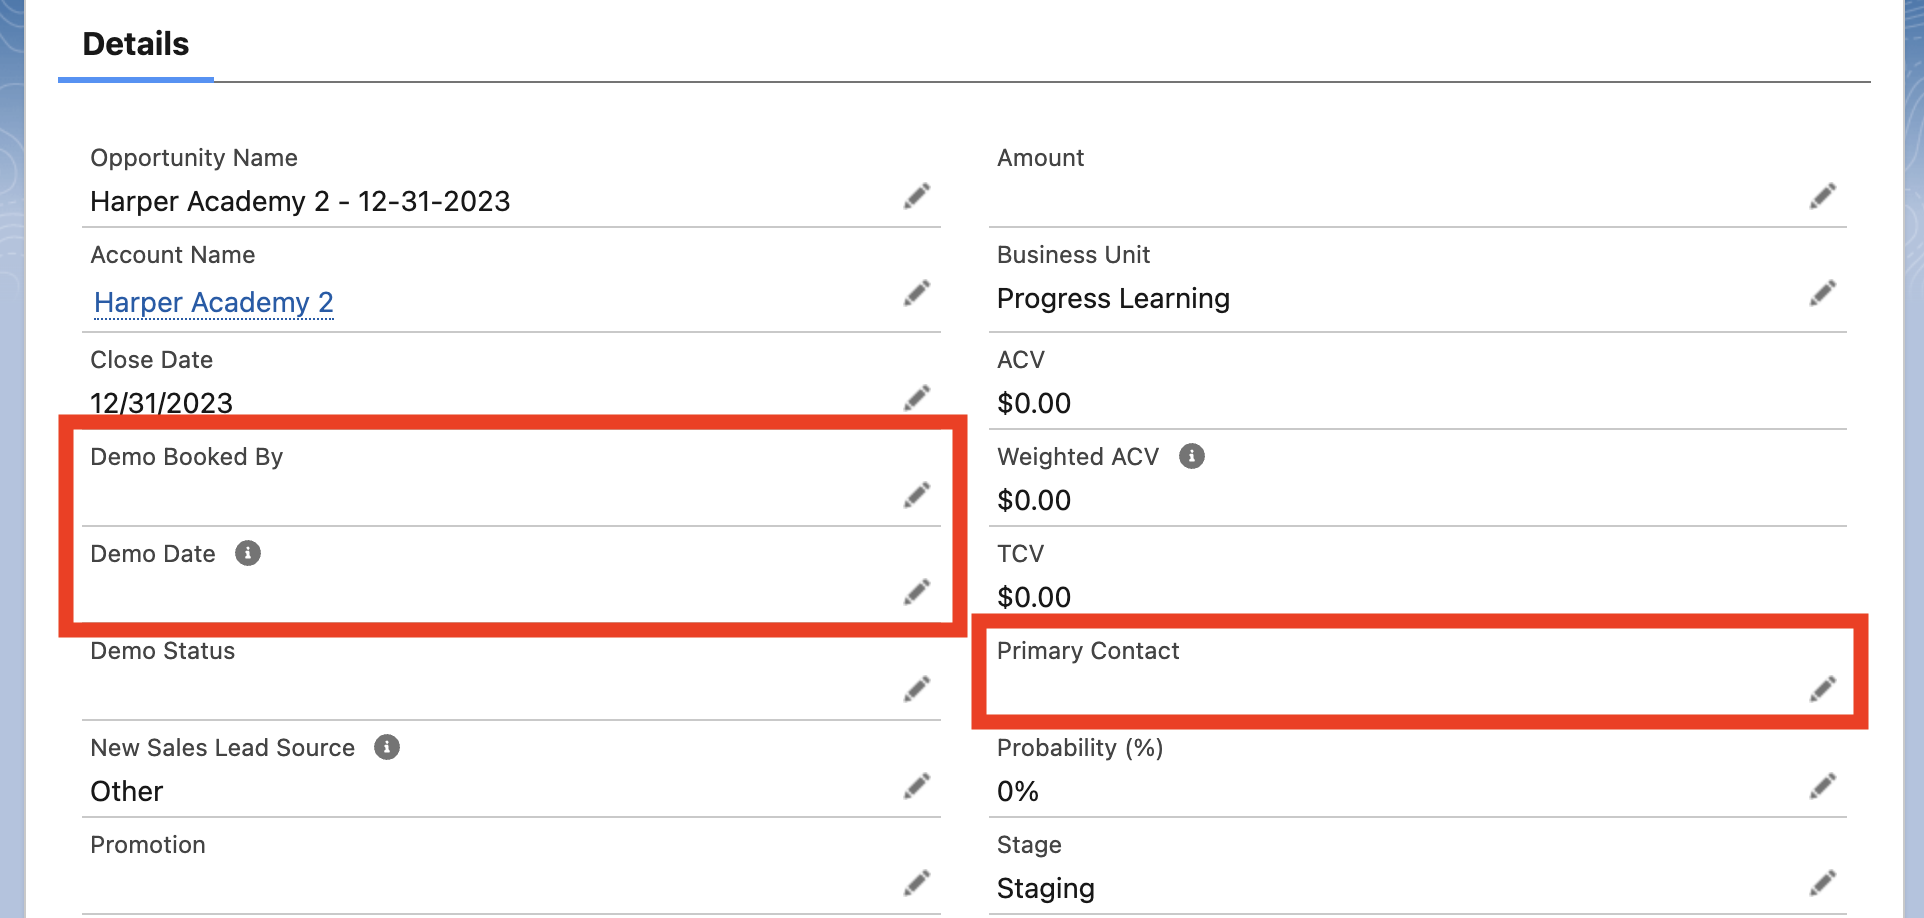
- From here, go to the opportunity and fill in these fields:
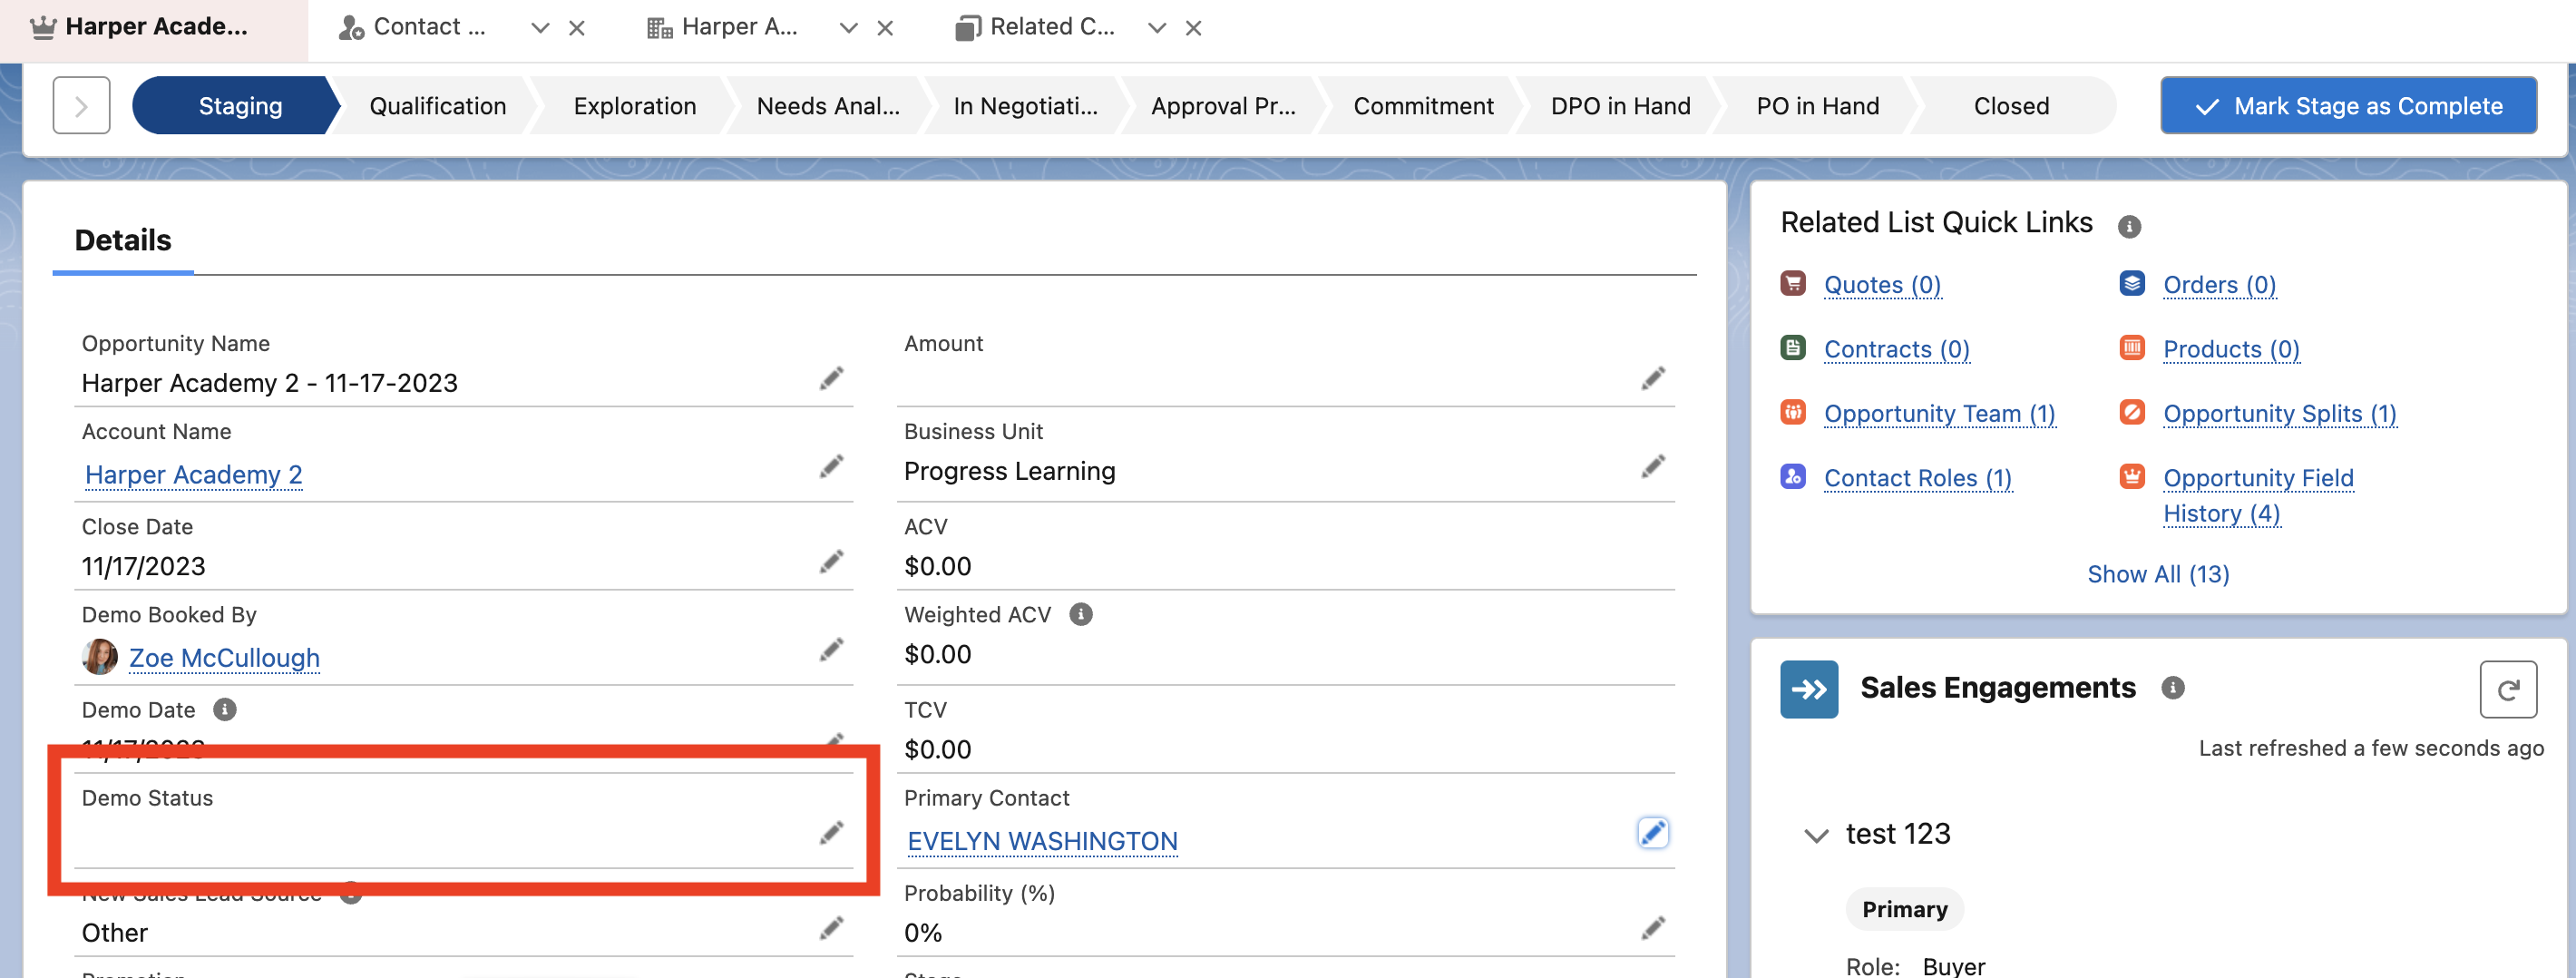
Step 3: (Post Demo) Mark Your Demo
- In the opportunity, immediately after completing your demo, you will mark your demo as Completed under the "Demo Status".
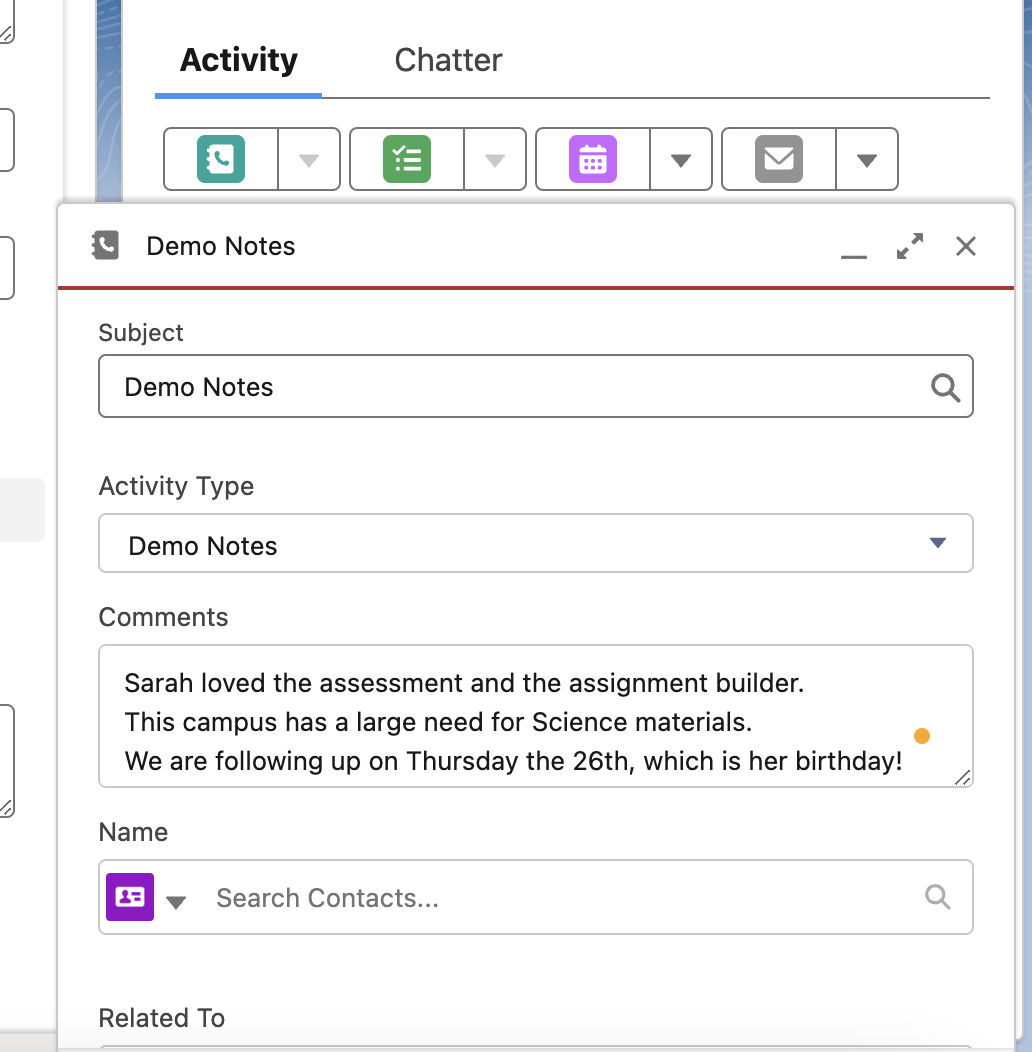
- You will also need to add the notes and important information you gathered from the call.
Step 4: Setting up Tasks/Calendar Blocks/Next Steps
- As you move throughout the sales cycle, it is vital to set yourself tasks to serve as a reminder to carry out follow-up emails/calls to ensure the sale doesn't become stagnant.

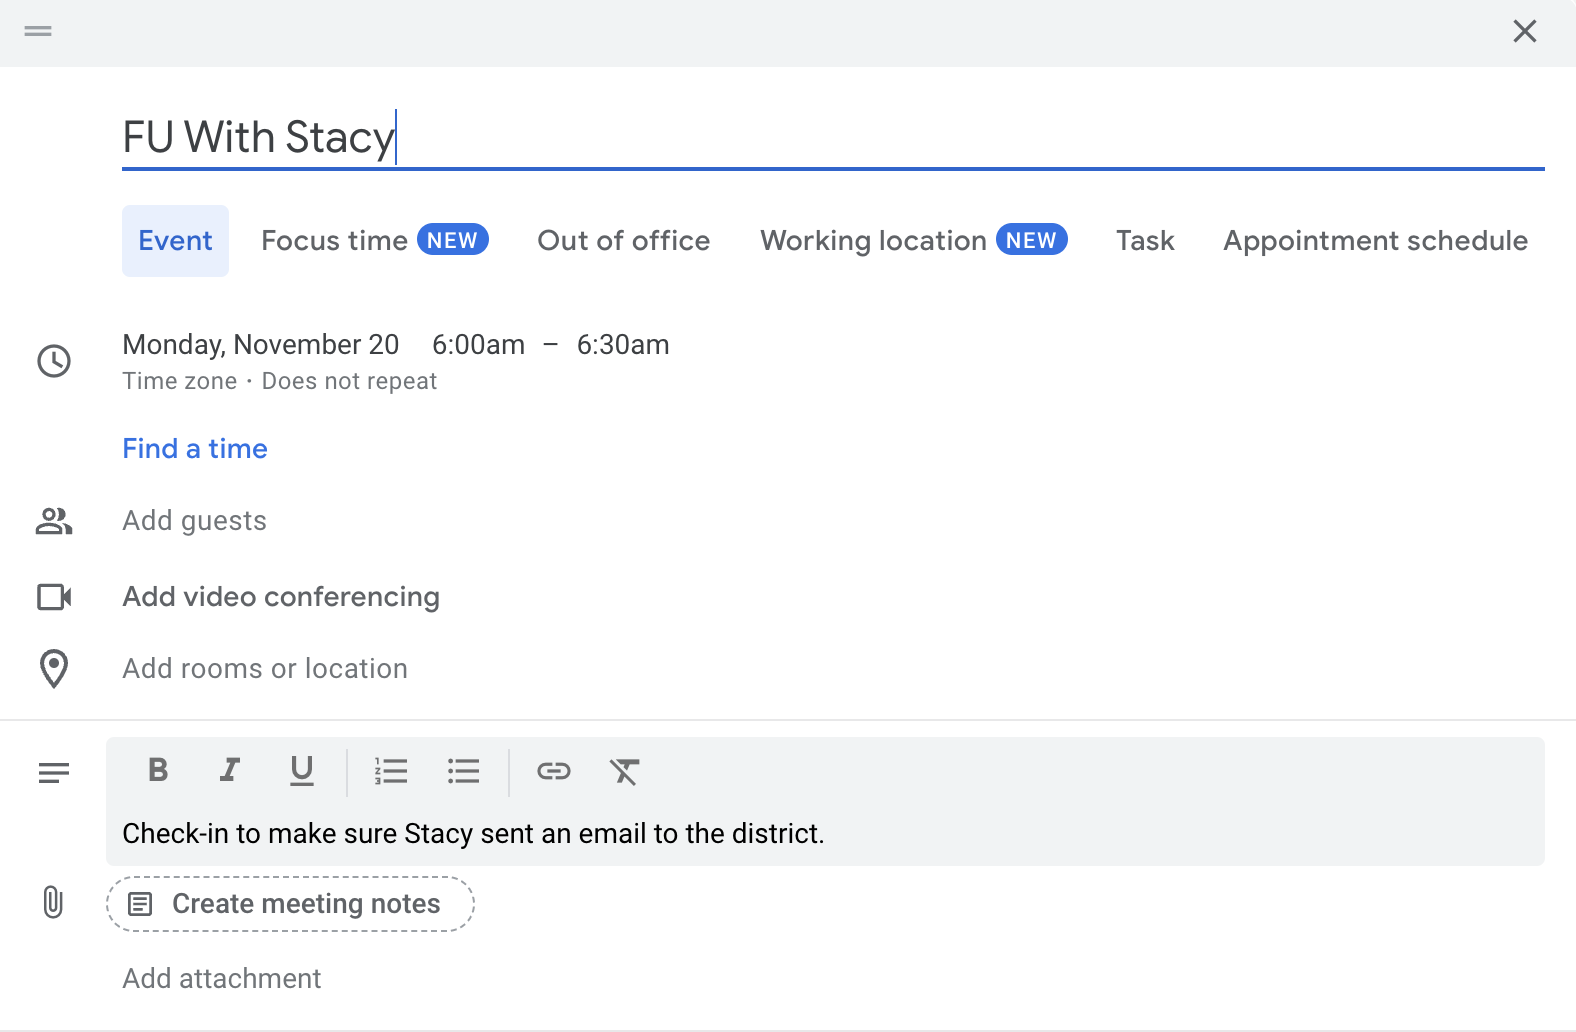
- When you set a task in Salesforce, it is also important to set the same reminder in your Google Calendar. In case you miss one, you will have the other.
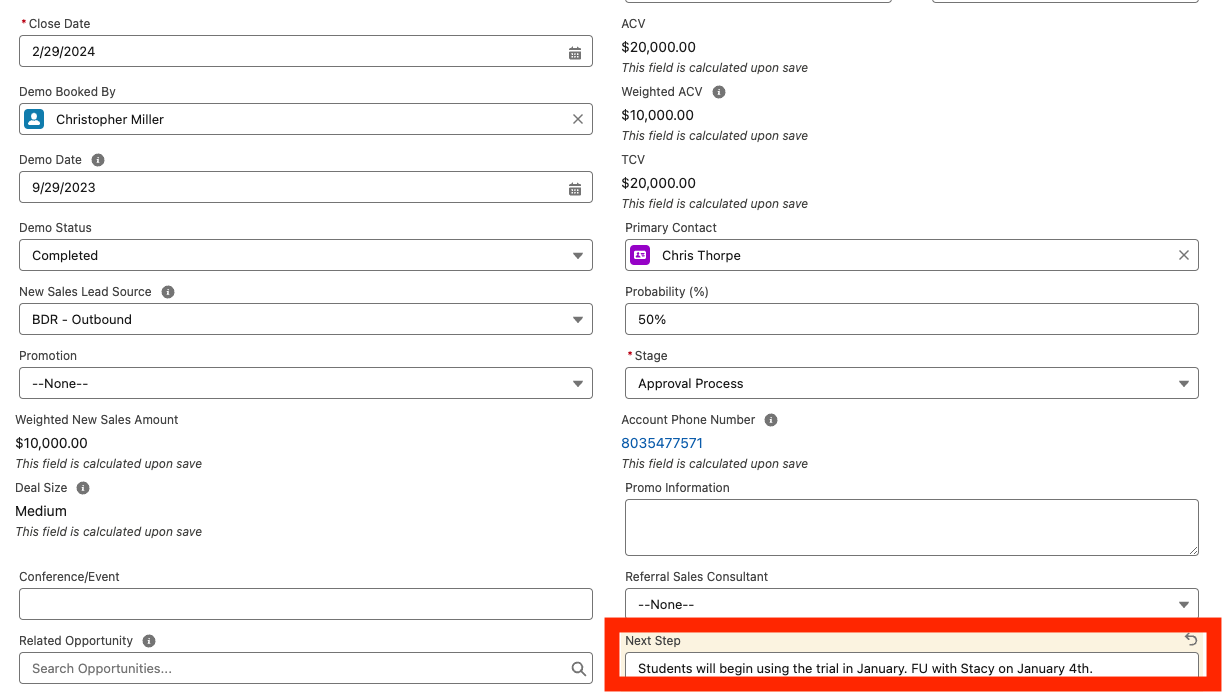
- You will also need to continue updating the "Next Step" Block located in the opportunity. As you are moving throughout the sales cycle and adding the "next steps" notes into the opportunity "Activity" section, add these same notes into the "Next Step" block as seen below:
Step 5: Moving Through Pipeline Stages
Stages carry the weighted value of your opportunities. Each stage has its own meaning. See below:
- 0% - Staging:
- Demos that are scheduled but not happened and demos that need to be rescheduled
- 2% - Qualification:
- Pre Quote Request
- Can house trials for now
- 5% - Exploration
- Any lead or contact that an AE wants to track via an opportunity
- 10% - Needs Analysis
- Post-demo
- The customer provided feedback on what school(s) needs
- Quote in hand
- 25% - In Negotiation
- The customer has stated they are interested in having more discussions. Needs to see pricing, bring in others, etc
- 50% - Approval Process
- The customer has stated they want to move forward and the deal is getting approved by the board, principal, etc
- 75% - Commitment
- The customer has stated that the deal was approved with a signing date.
- 95% - DPO in Hand
- The customer has signed a Delayed Payment Option (intent to purchase)
- 99% - PO in Hand
- We have received the PO from the customer(this is for finance)
- 100% - Closed Won
- A completed opportunity that has been processed, activated, and invoiced
- 0% - Closed Lost
- The opportunity has been declared lost
Step 6: Before Finalizing the Sale
Once the PO comes through, before sending it off to orders, Make sure the following is completed:
- Make sure your implementation, integration, and billing contacts have been updated.
- Make sure the start date reflects the day you received the purchase order and then update the end date.
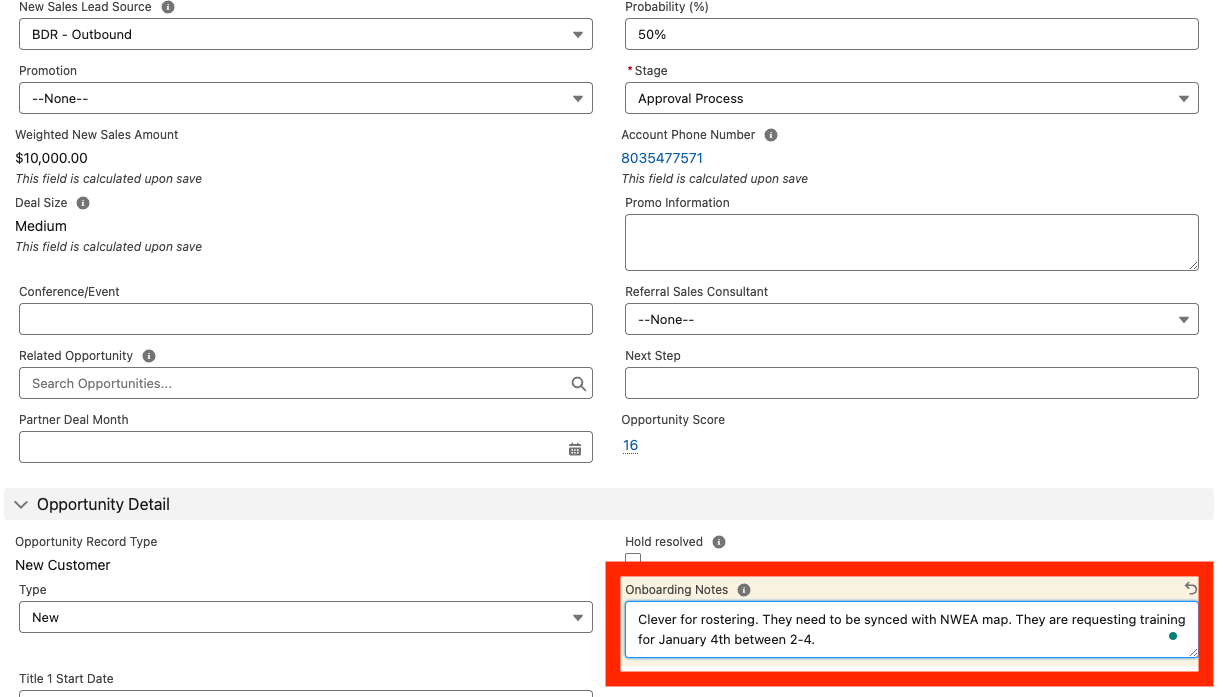
- Make sure the "Onboarding Notes" have been filled out so that the OBS knows important information about the customer, such as what integrations they will need, specific requested training dates, etc.
Step 7: Finalizing the Sale
Once done, send the PO to orders@progresslearning.com. Once the PO has been processed by orders, follow the steps below:
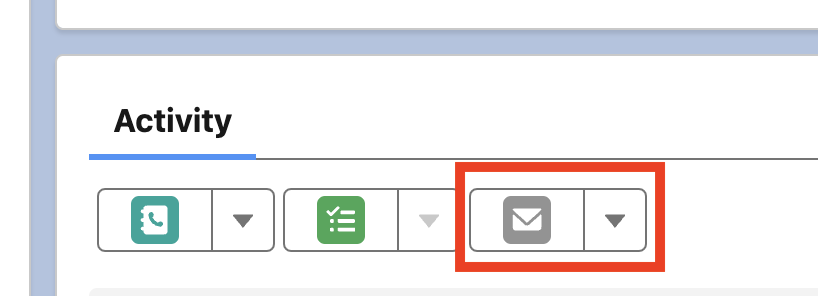
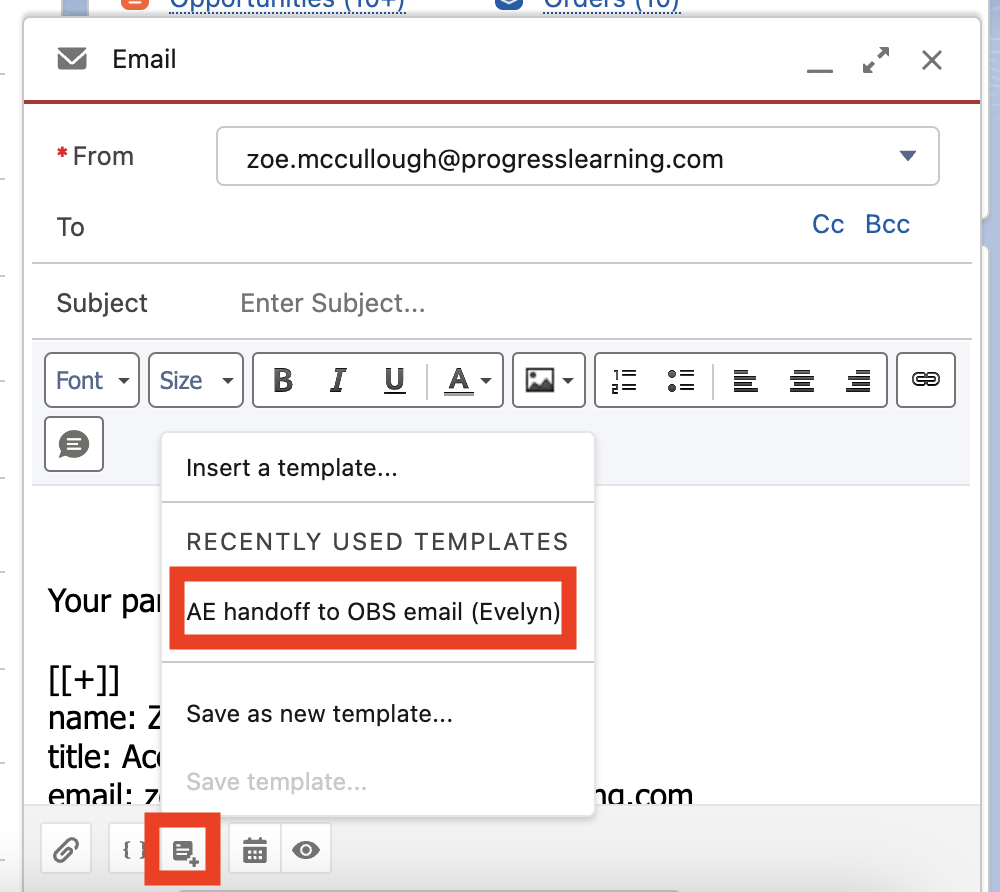
- Go to the account page and click on the email icon under "Activity".
- You will put the name of your primary contact and all important parties in the email and cc the onboarding specialist.
- Do not put anything in the body of the email, but instead, go to the bottom and click on the chat box as shown in the example below. You will choose the option "OBS Handoff Email".
- Click "Send" and you're done!
