Go to the EG CRM and look at your pipeline. Open up the Account Info.
In Salesforce, search for the account name. Verify the address and related contacts are there.
Hover over Related Contacts in the Related Quick Links section.
If the Related Contact (1) is not there, hover over Leads (2) in the Related Quick Links Section. If the Related Contact is there, skip to step 3.
If the person is listed as a lead, click on the name of the lead record and convert the lead using this article.
If your contact is not listed as a related contact or lead:
Using the Search bar, search for the contact's email, name, or phone number.
If there's a contact record, and the contact is not related to the appropriate account, use the Add Relationship button on the contact record to relate the record to the appropriate account. Select the role(s) and update any necessary information on the contact record such as email or phone number.
Please ensure you have at least one contact with an Implementation and Billing role selected before moving your opportunity to PO in Hand.
Hover over Opportunites in the Related Quick Links section and click New.If you converted a lead, your opportunity may already be created, open up that opportunity record if so.
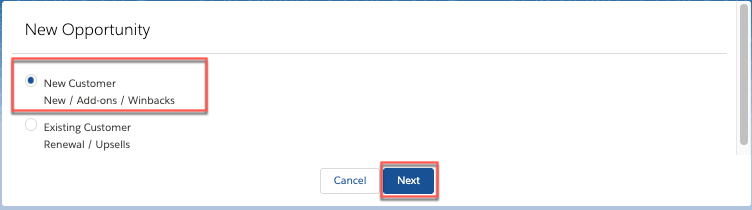
Select New Customer, click Next.Complete the required fields and click Save.
Opportunity Name - you can enter anything here, once you click save, the Opportunity Name will default to the correct name.
Type - select the type as "New"
Stage - select SQL
Close Date- enter the estimated closing date.
Primary Contact- select who the quote will be delivered for review
New Sales Lead Source- select the source, how you obtained the prospect.
Optional - enter any applicable promotion details
Optional - for Title 1 opportunities, input the appropriate dates in the Title 1 start/Title 1 end date fields.
Click Save.
Hover over Opportunites in the Related Quick Links section, and click the opportunity name.
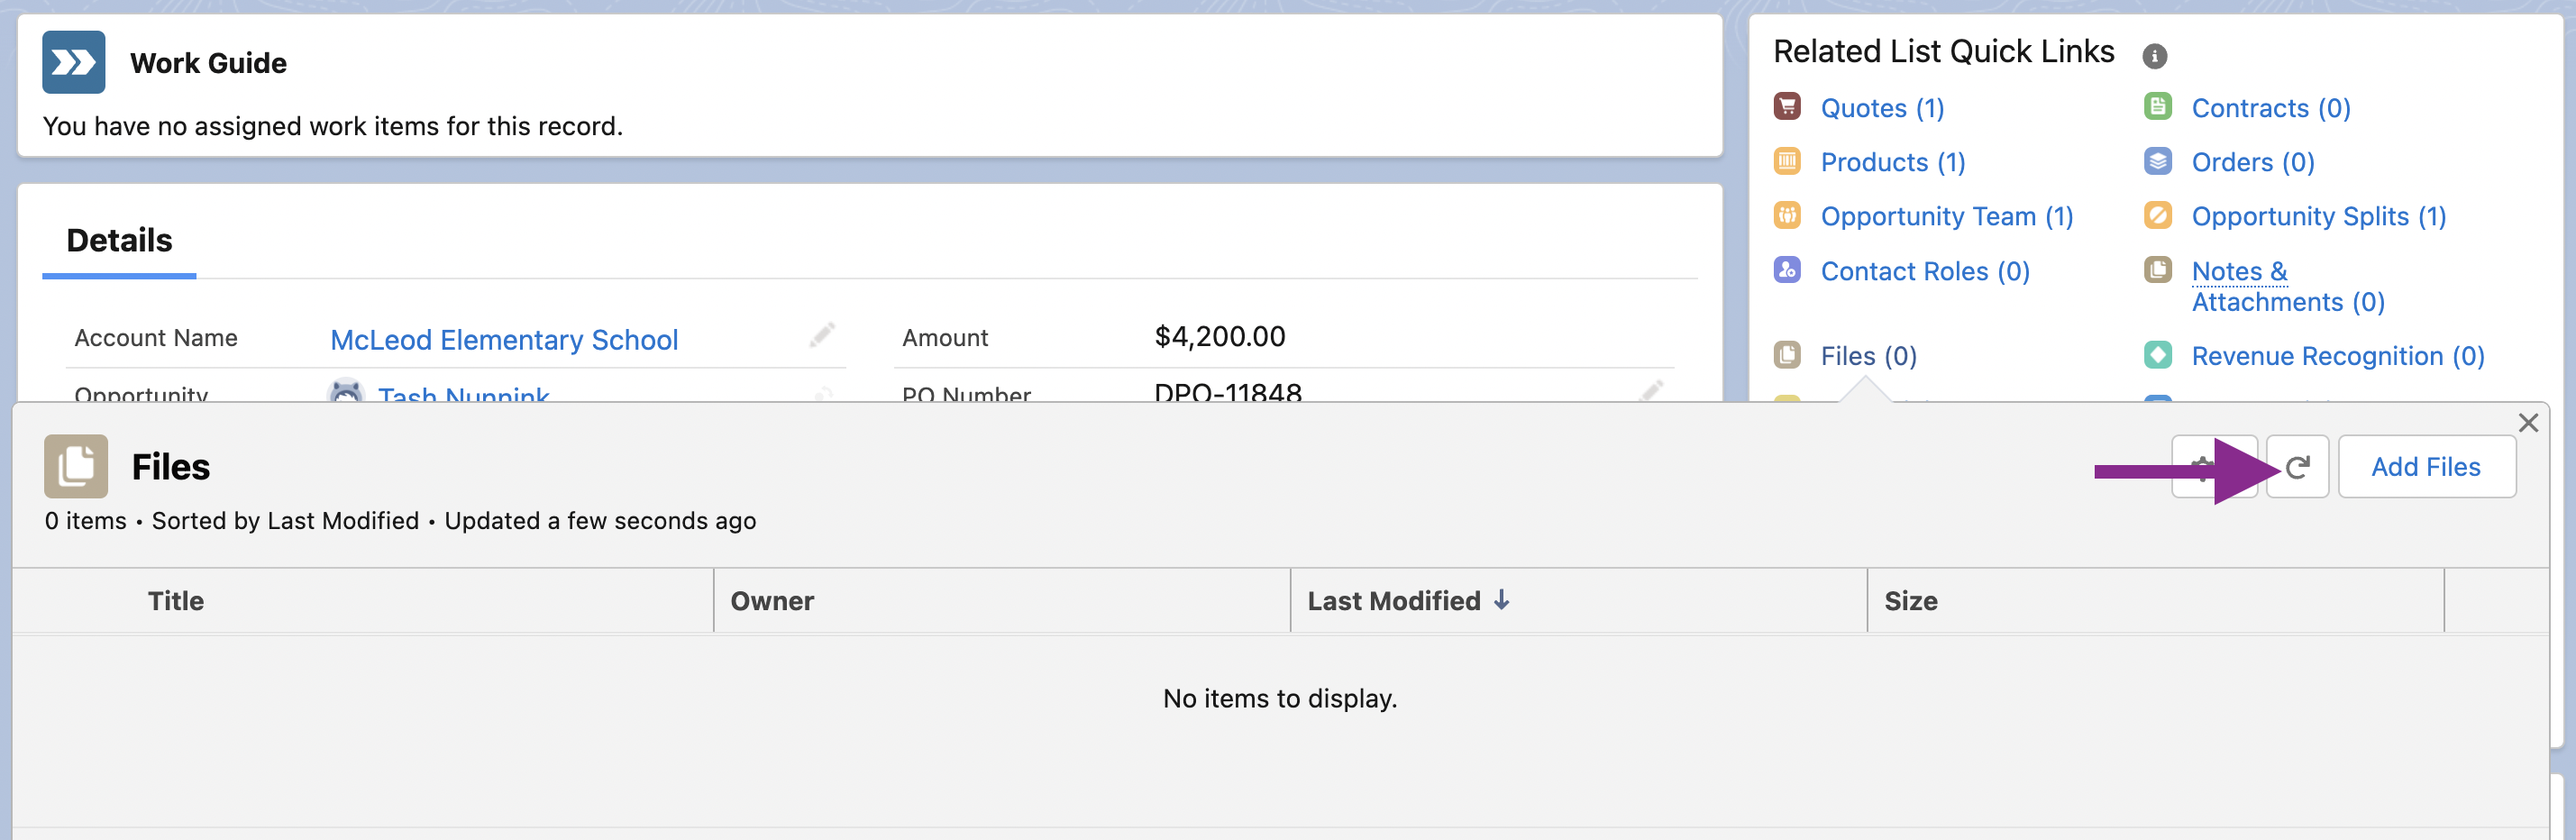
In the opportunity record, and in the Related Quick Links section, hover over Files and click Add Files. Upload the EG proposal. Optionally, In the activities section, create a New Task for yourself to follow up on the quote.
Once you receive the PO or DPO, you will need to create a quote.
Creating the Quote
In the Opportunity record, click New CPQ Quote.
In the Opportunity record's Related Quick Links section, hover over the Quotes link and click Edit Lines.
Update the Start and End Dates if applicable. Enter a Note here to notate a promo.
For Promotions:
Ensure the End Date and Notes reflect the promo. For Example: for a 6-month promo, on the quote, ensure the end date is set for 6 months past the term and put the promo in the notes (6 months free January promo).
Ensure the account in the End User field is the account that will receive the products.
This is helpful to know when creating a district quote. The end-user is the name of the school that will receive the products.
In the first group, the End User field will default to the District account. Update the End User field with the school account that you would like to add to the quote. Click the arrow next to add products, click Clone. On the second group, remove the account currently populated as the end-user- click the X after their name in the End User field. Update the Products as needed.
The new group will be renamed and associated with the group.
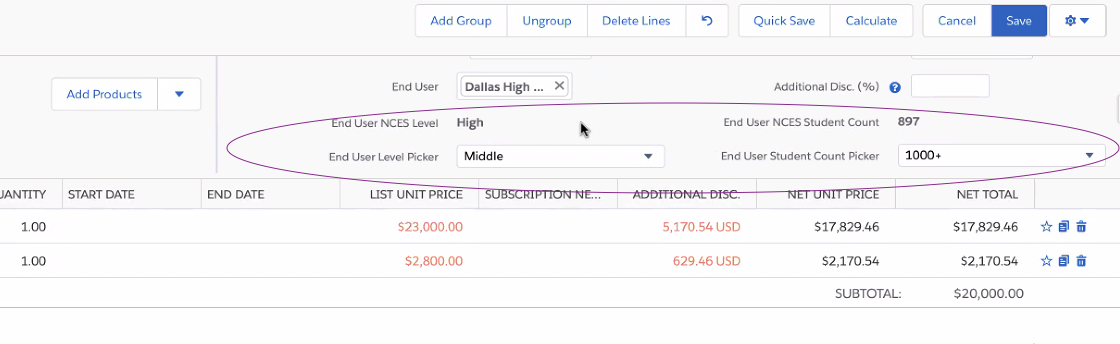
The End User NCES Student Count and End User NCES Level fields automatically populates according to NCES data. You may override these fields as necessary by using the End User Level Picker and End User Student Count Picker drop down fields. Please note the pricing will update to reflect your adjustments.
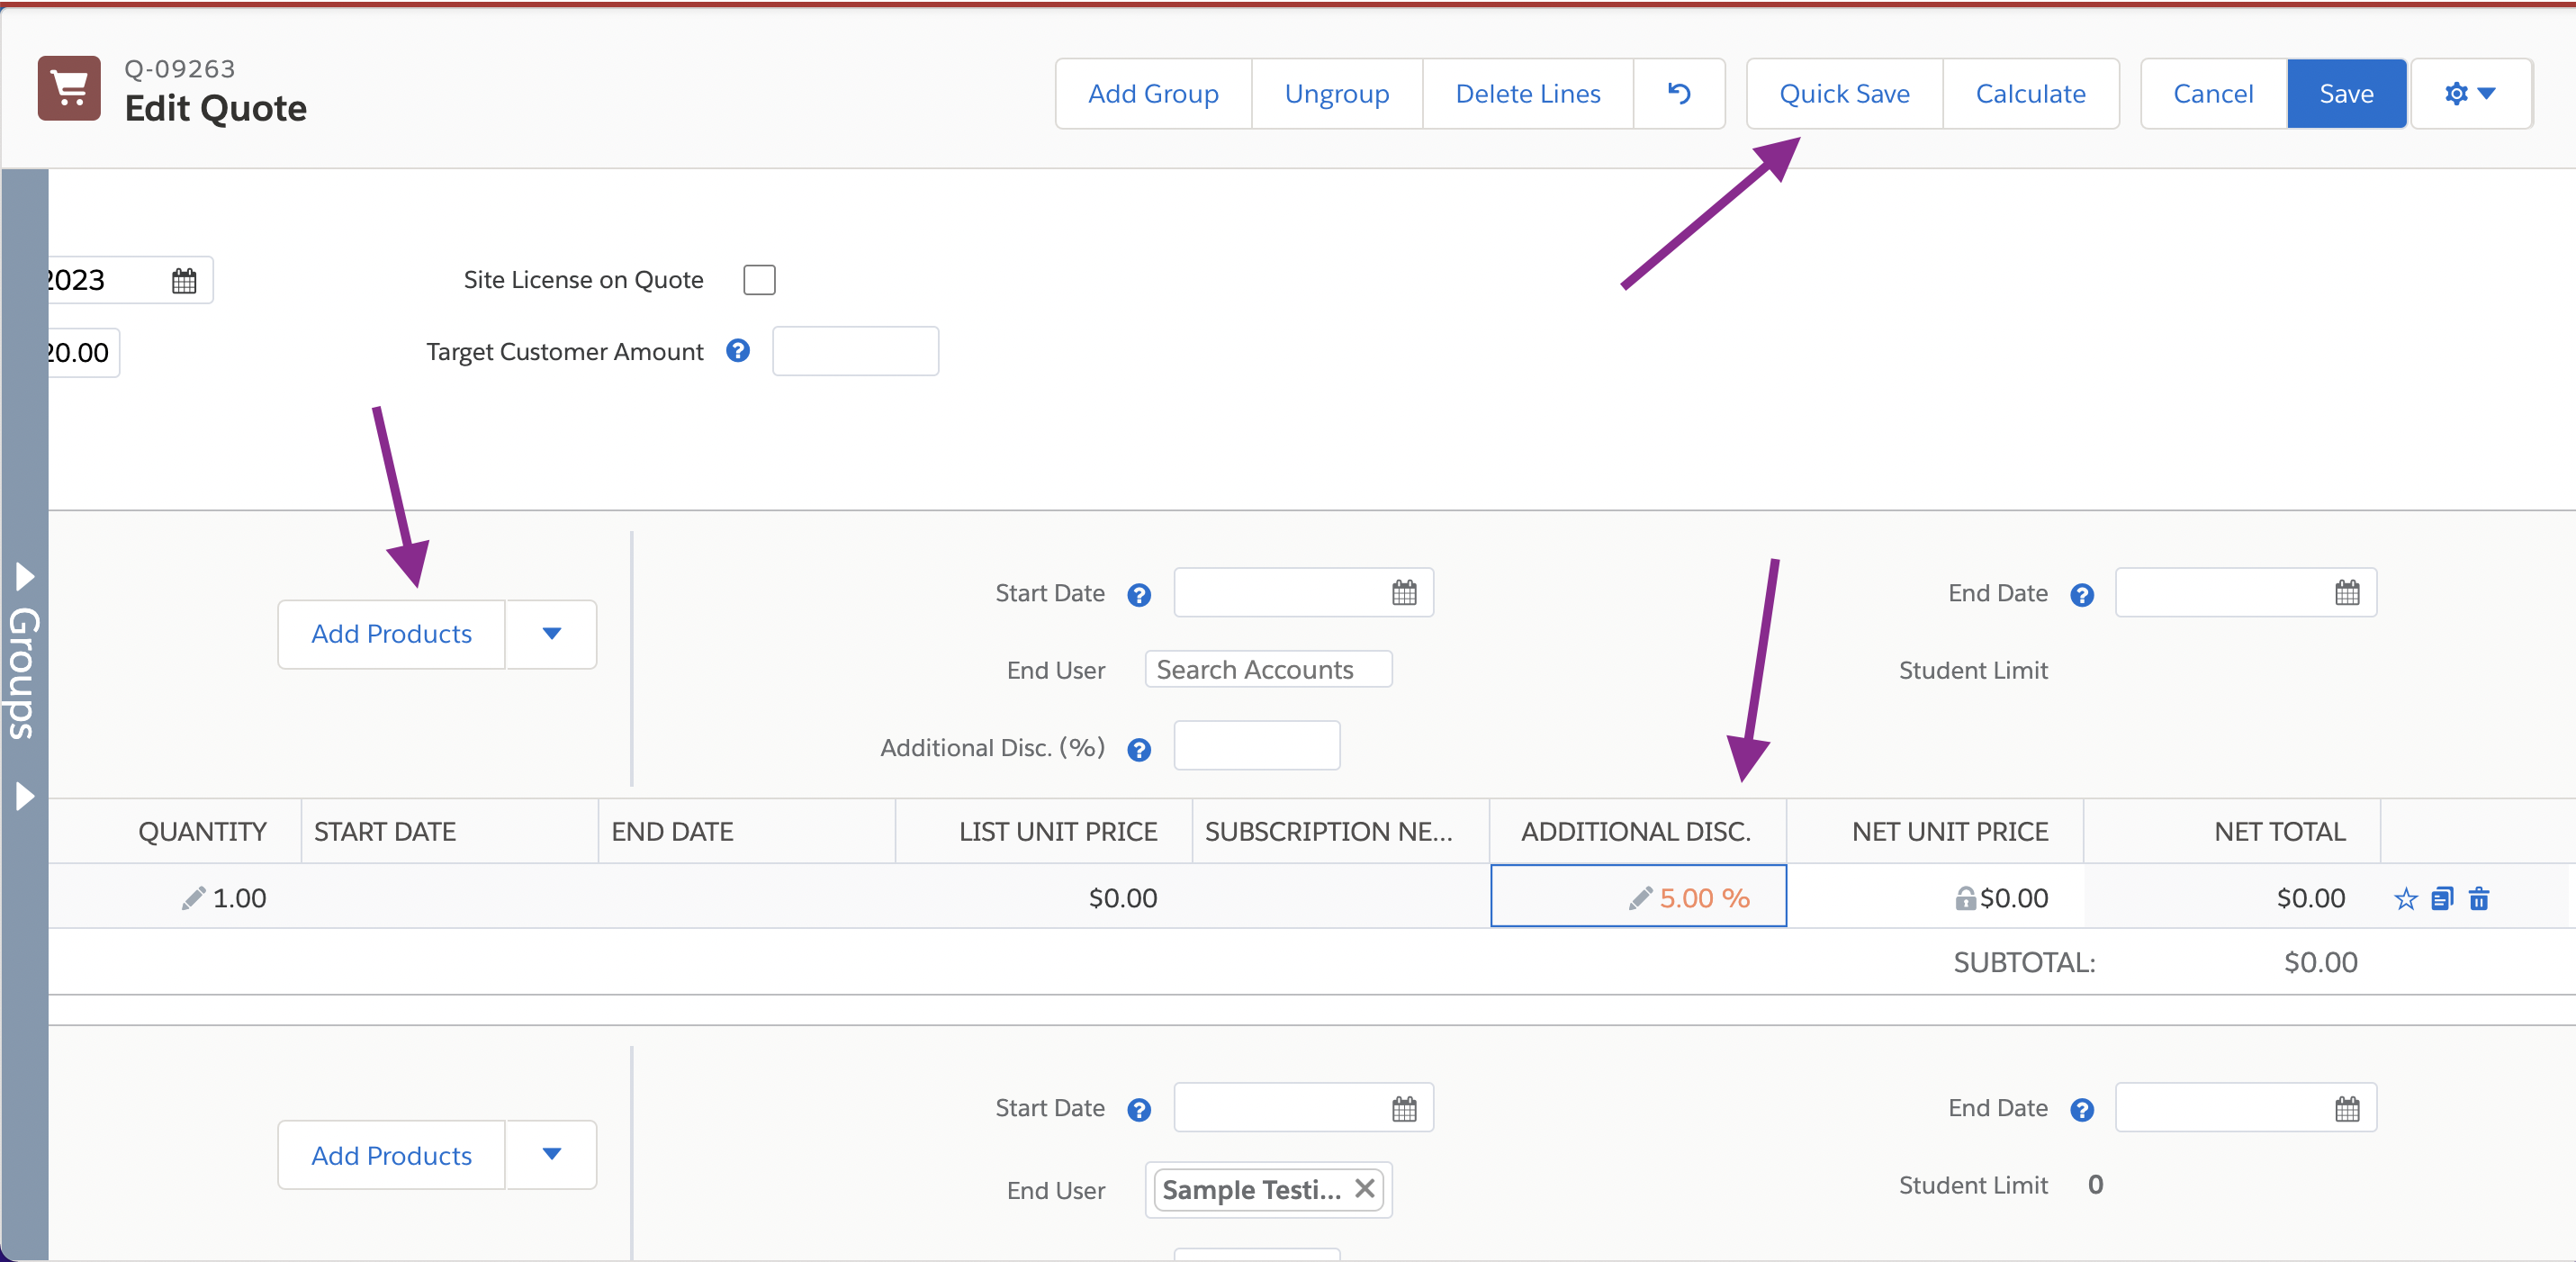
Add Products.
Enter an Additional Discount % percentage amount that you would like to be applied to all line items in the quote. Click Quick Save to preview the updated total.
You may also enter the amount you quoted in the EG CRM into the Target Customer Amount which will distribute the discount equally on each line item.
Do not combine % and $ discounts in the same quote- an error will occur.
Click Save to save your quote.
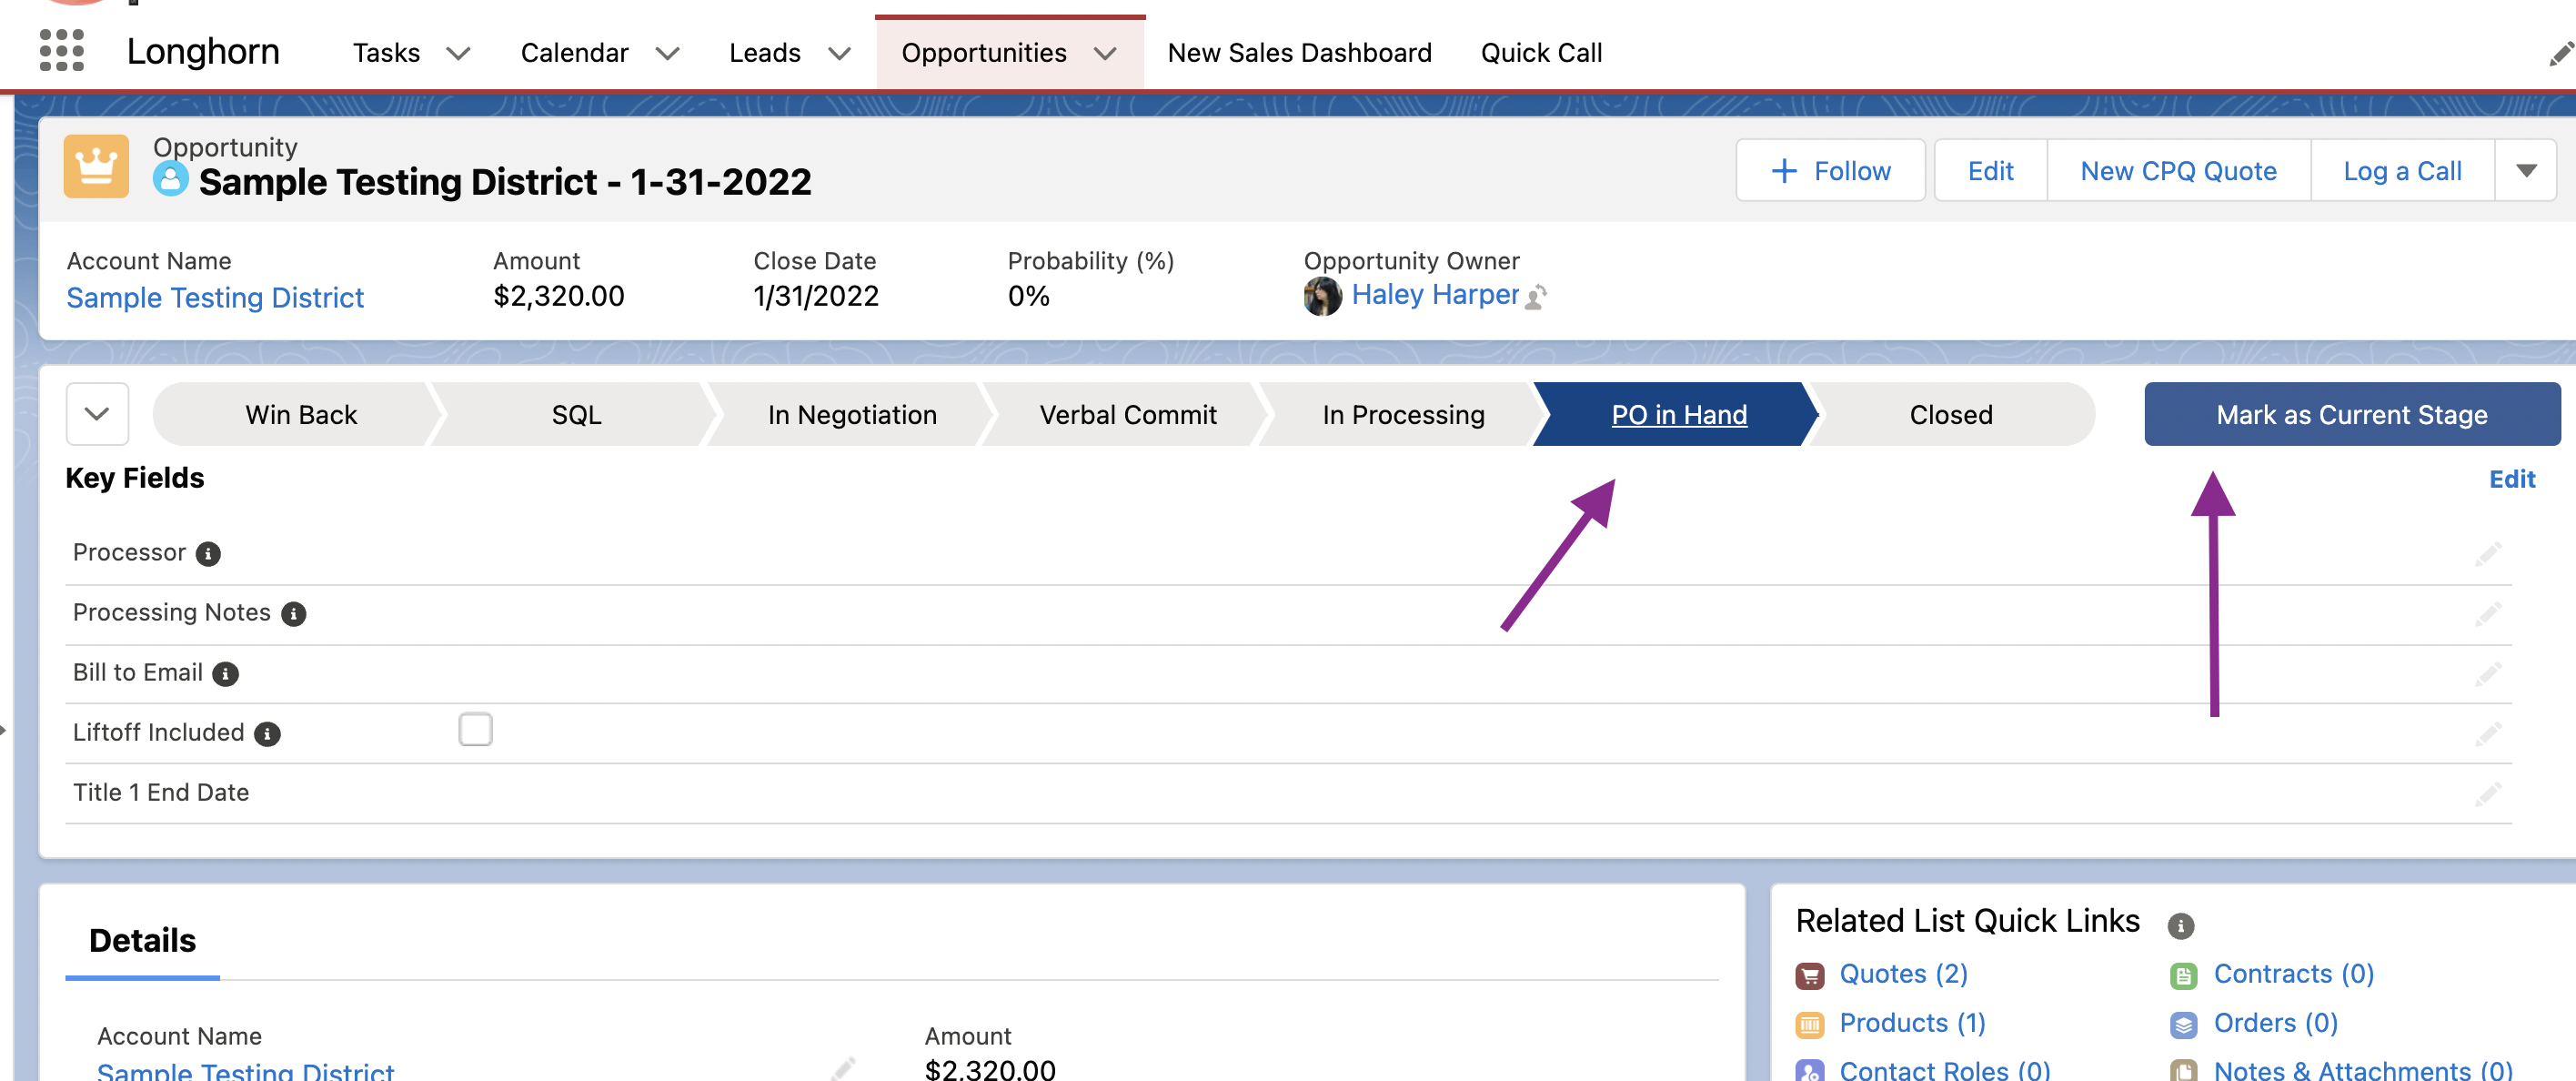
On the Opportunity record, click the PO in Hand stage and click Mark Stage as Complete. You can also use the Activity section to Log a Call, Create a task, and Email from Salesforce.